Posts

Showing posts from April, 2016

Hide Outer Wrapper, Sidebar Wrapper in Blogger

Image
This is one of the biggest problems for new Bloggers that Hide Outer Wrapper, Footer Wrapper, Sidebar Wrapper in Blogger Pages static pages, and make the some or all Blogger pages show in full width. Today, I am going to give a unique and easy solution for each Blogger who want to done his/her job done. Many Bloggers use the different blog with different template that has different settings. Check out: How to Hide/Remove Quick-Edit Pencil icon in Blogger template Today, I finally took the time to generalize this tutorial. Anyone can use the solution on this page, and you'll get what you want - refer to the title, I'm not gonna repeat what this tutorial does. Or maybe I will. You get to hide your sidebars (doesn't matter left, right or both) and use that space to widen your main posting area, on pages that you choose. You can apply this trick both on your static pages and/or your post pages. Check out: How to Open All Blogger External and Internal Links in New Tab Hide/Rem

BlogSpot Support Center: Knigulper Forum

Image
The moto of Knigulper forum is to resolve the blogger issues like blogger, Templates/Themes,, JavaScript, JQuery, Plugins, HTML and SEO assistance. I hope this forum may bring the useful results for those who are new on the blogger track. Basic Instructions: Simply Click the NEW TOPIC at the top of the Group and Select atleast one tag at the bottom of the group while posting/asking. Here is an example: Suggested tags: Blog-Designing, Blogger-Template, JavaScript, SEO, Widgets, Plugins, Content, SMM, Jquery, XML, XHTML, etc. At least one tag is required when posting to this group Kindly follow these rules before posting Search before posting Explain your problem in brief Respect other members and be helpful Don't use this forum for spamming and promoting purpose General Posting Guidelines We figured this was necessary because a lot of people come in and post threads without thinking, and without realizing that there is no possible way they could get help because of the way they

Removing The Quick-Edit | Pencil Icon From Blogger Template

Image
Quick-Edit or Pencil icon shows at the top of your blog posts to access the admin panel to edit you published blogger posts and widgets quickly. You may have noticed the pencil or gear like icon(s) on your blogger site. Well, they are called the Quick-Edit icons for blogger posts or page post to easily editing tool . Simply it’s the BlogSpot Shortcut edit. But the headache is that they even appear publicly, that can eat up the beautifulness of your blogger template. Check out: How to Stop BlogSpot from Redirecting to Country-Specific Domain Should i Remove this Icon? It depends on the Icon privacy. Try to log out from you blogger and visit you blogger to verify whether the Icon shows publicly or not. If the icon is showing publicly, I recommend removing the icon . But the icon show only when you are logged in, then don't remove it as it plays an essential role to access the post editing element easily. Basically removing the Quick-edit icon is as easy as A, B, C. There are two m

Online Word Calculator | Character Count/Calculator

Online Code Compressor

Adding Animated Social Media Buttons to Blogger

Image
Whenever your readers read your helpful blog posts, they just want to share them with their friends, colleagues, co-works and with other persons. But think if you don't have buttons on your blogger, what happens? Correct, they just skip it and the chances are, you are going to miss your new readers. This Animated Social Share Button For Blogger are those share buttons that make your blog more attractive.There are many websites which offer the social share buttons like Adthis Share, Addtoany etc. Read Also: Auto Sharing Blog Posts On Social Media Networks Today, I am going to share an awesomely animated mouse hover social share button for blogger. This share button is fully customized with CSS. Using this share button you should add Facebook, Twitter Google+. Linkedin and Pinterest share button on blogger blog. Check out: How to Add Css3 Social Media Widget to Blogger Sidebar How to Add Social Media Buttons to the Bottom of Your Blogger Posts Before i continue to the steps, i

Add Popup Email Subscribe Widget to Blogger

Image
In my past post, i showed you How to Add a Beautiful Email Subscription Form with Feedburner to Blogger but this subscription form has been created with css3 and jquery. In this tutorial i share how to add pop up email subscription widget in blogger. By adding this widget, you should easily increase your blog readers. It's a better way for increase blog readers. I hope this fresh pop up email subscribe widget will help you to increase blog readers. Now lets start the tutorial. Check out: 21 Handy Blogger Widgets and Plugins For BlogSpot Blogs Adding Email Subscription Widget in Blogger Go to blogger Dashboard >Template >Edit HTML  Click anywhere inside the template editor Press Ctrl  + F and locate the ]]></b:skin> tag Copy the the following codes and past them just before the ]]></b:skin> tag #sub-box {display:none;background:rgba(0,0,0,0.9);width:100%;height:100%;position:fixed;top:0;left:0;z-index:99999;} #boxclose {width:100%;height:100%;-webkit

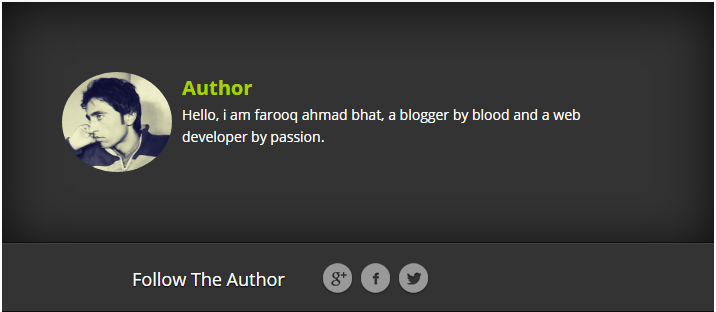
Dark Author Bio Box Widget for Blogger Blogs

Image
If you are looking for a fully responsive author bio box for your blog, Simple Author Box could be the one for you. This lightweight piece of code will add an attractive author box at the end of your every blog posts. The author box displays the author name, description, and links to various social media accounts. Including an author box in your blog posts makes sure that your visitors can find more information about the author on the same page. Contrary to popular belief, adding author box after the post is very simple. Check out: How to Add Author Bio Box Widget to Blogger With Social Media profiles If you wish to give your blog a professional look, then here I will show you an excellent trick which let you add author Bio box within no time. You can also choose to display links to all posts by the author and link the author name and avatar. It is also possible to apply custom CSS styles to make the widget look more attractive according to your need. Check out: How to Add Css3 Soci

How to Add PopUp Facebook Like Box Widget to Blogger

Image
Targeting the blogger visitors is the most important way of any blog. If you want to increase your Facebook like then should promote your page on your blog with your blog's users. Then you will get more like from your users who visit your blog. Adding the pop up like the box is most essential for getting more like. So today I am gonna to share a tutorial about popup facebook like box for blogger. This widget was made with some cookies developed with jQuery. Recently I build another popup facebook like box widget using CSS and JavaScript No cookies included. Check out: How to Add Bottom Floating Facebook Like Box Widget to Blogger How Does it Work? Recently i found a pop-up jQuery and I used this jQuery in this pop-up facebook like box widget eZmodal is a simple and fast jQuery plugin which enables you to display static HTML content in a responsive, fully configurable modal popup window. This a best popup plugin. That's why i used eZmodal in this widget. Pay Attention:

Auto Numbering Popular Posts Widget for Blogger

Image
In this tutorial i will share how add a popular posts widget in your blog with Thumbnail and auto numbering. Blogger popular posts widget shows the most clicked and most visited posts in your blogger. This widget have been created with CSS elements. The widget is easy customizeable. Blogger popular posts widget is a most important element for your blogger blogs. This widget help your visitors to find most viewed or most discussed posts. Check out: How to Add Responsive Related Post Widget to Blogger Today i am sharing a popular posts widget for blogger blogs that show popular posts of your blog thumbnail with auto numbering. Using this custom popular posts widget, you can make your popular posts widget more unique that is important in your blog. Pay Attention: How to Add 15+ CSS3 Transitions and Animations to Blogger Adding Auto Numbering Popular Posts Widget to Blogger Go to your blogger Dashboard >Template > Edit HTML Copy the CSS code and add it just above the ]]&g

How to Add Arrow Key Navigation Widget to Blogger

Image
Navigating through a website using the keyboard arrow keys is really useful as you don't have to look around the page for the Newer or Older page links. You might have already seen this feature on many top blogs.It’s really easy to implement this feature on your Blogger Blog.You just have to add the arrow key navigation widget to your blogger blog. Check out: How to Add Google Breadcrumbs Navigation to Blogger This is a really simple and clean widget and you can see a demo of this widget right on this page. If you use the Right and Left arrow keys, you will be able to navigate to different pages on this blog. This works not just on the post pages, but also on the blog’s home page and label pages.The Arrow Key Navigation Widget will be disabled when you are typing something into a text box on the blog(This was done to avoid the page from being changed when the user is typing something into a text box and uses the arrow keys to move around this text). Pay Attention: How to Add Blog

Replace No Comments Label With Your Own Text In Blogger

Image
By defaul, every blogger template comes with the No Comments or 0 Comments label if there is no comment on your blog post. The commenting system and a rumored Google+-based solution for sites, there are still some minor tweaks that can make Blogger comments work better on your blog or site. One thing that nagged me was the fact that below each article there is a rather big section dedicated to the number of comments – which is well and nice if there are comments, but completely useless on posts with none (I have a fair amount of those, as most casual bloggers do). Check out: Publish Your Blogger Post Codes in Stylish CSS3 Boxes So if you want to remove that part of the page with your own text or number, follow the steps in this article. This involves changes to the HTML template, so be sure to back it up first, just in case. Recommended: How to Remove Remove Footer Credit Links in Blogger Note: After you complete the below steps, your blogger post will show the text that you want

6 Stylish Blockquote Designs for Blogger

Image
Our blogger site needs many CSS elements to display the special portion of texts to catch the readers attention. We use the bullet list or numbered list to make our post more attractive and beautiful. But when we publish the codes within our blogger posts we usually insert the blockquotes around the codes but sometimes we do not feel satisfied with the blockquote because some blockquote styles are looking annoying. Check out: 4 Killer Horizontal Email Subscribe Widget For BlogSpot Today, I am going to share some block-quote designs that will give a beautiful look to your blog posts. All you need to choose your preferred style and install this in your blogger template. Pay Attenton: Beautiful Syntax Highlighter for Blogger Adding Blockquote To Your Blogger Template Choose your proffered style and copy the code Go to your blogger Dashboard  > Template  > Edit HTML Press Ctrl & + F and click anywhere inside the template editor Type ]]></b:skin> in the search box

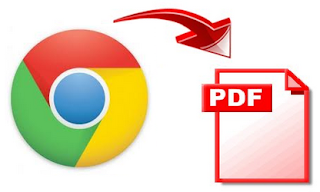
Converting a Webpage Into PDF File Without Any Software

Image
In this post i will teach a simple trick or browser feature that let you convert any web page into PDF file format, which might help you to read your favourite articles offline.Are you really interested in this post? Do you really wanna learn this trick simply not a trick but an idea? Do you wanna convert webpages into PDF File? If your answer is yes this post is for you. Pay Attention: How To Open Multiple Websites With double Click Converting a Webpage Into PDF File Without Using Any Software Open Google Chrome from your PC or MAC Then go to the web page that you want to convert as a PDF Now press Ctrl + P on Windows PC or Command + P (Mac) to Open the the Print dialog on Google Chrome Now Change the destination to “Save As PDF” and hit the save button The current web page will instantly be downloaded as a PDF document

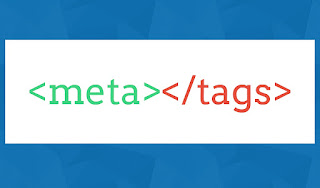
SEO Facts: Top 10 Meta Tags for Blogs and Websites

Image
Meta Tags and Why to Use Them? Meta tags are textual snippets used to define the website contents. Meta tags are used to provide the deep information about the website's content to search engines. Like any other tag, that tags do not appear on the page where used. Meta tags are added to the <head> section of HTML web page. There are many meta tags with different attributes used to define many different aspects. Such as content's description, keywords, author's info is defined by using the meta tags. We can say that meta tags define "data about the data" that a website or web page holds. Use of meta tags is a quite good practice to fulfill a very basic SEO phase. In that article, we will discuss the Top 10 meta tags that must be used on any blogger/website to fulfill a basic SEO phase perfectly. Read Also: Important SEO Pack for Blogger: Alternative Yoast SEO Plugin How to Use Meta Tags in Blogger/Website? In any website, meta tags can be used under <hea

Social Media Open Graph Meta Tags for Blogger

Image
In order to get more and more visitors to your blog, you must be a wonder to share the posts on social networks like Facebook, Twitter, Google Plus, Pinterest etc. But unfortunately, when your readers click the sharing buttons, they can not share the correct post description and thumbnail. In these cases, you have to render social media tags inside your blogger template to avoid the wrong post description and thumbnail. Pay Attention: Yoast Alternative: All in One SEO Plugin for BlogSpot Blogger You might have noticed that comment avatar, and other irrelevant images from your sidebars come up when you share the post on Facebook. The solution to this is to specify the image in the page metadata. We will be using open graph tags for the same. Check out: SEO Facts: Top 10 Meta Tags for Blogs and Websites Adding Social Media Open Graph Meta Tags to BlogSpot Blogs Login to your Blogger Dashboard >Template >Edit HTML Click inside the template editor and Press Ctrl + F Search the &

Fix Wrong Post Description & Thumbnail When Sharing

Image
Sharing on Facebook increases the page previews for your blog. Facebook is the giant network where everyone can be found. Therefore, you must be curious to post your blog posts on Facebook. When you share a post on Facebook, it will display a thumbnail picked from the post page along with a short description of the post. But in many cases, Facebook fails to identify the correct image and description that it should use. This leads to irrelevant images and description coming up on Facebook when you or your readers share the post. This is totally annoying, So for those who are trying to figure a way out of this, here is the solution. Recommended:  All in One SEO and Social Media Pack for Blogger Which Image and Description Does Facebook Pick from Your Post/Page Facebook regularly scrapes your page and caches the data to their servers. They look for metadata information og (OpenGraph tags and others) on your post page. The metadata can explicitly specify the image and the description to

Show Author Description Widget Below Every Post In Blogger

Image
An Author Bio Box is clearly defined as the writer of any written article. Author bio-box is the identity of a blog writer. In general, a blogger author is a person who writes the articles.  If you are looking for a fully responsive author bio box for your blog, Simple Author Box could be the one for you. This lightweight piece of code will add an attractive author box at the end of your every blog posts. The author box displays the author name, description, and links to various social media accounts. Check out: How to Add Dark Author Bio Box Widget to Blogger Blogs Adding an author box to your blog posts makes sure that your visitors can find more information about the author on the same page. Contrary to popular belief, adding author box after the post is very simple. If you wish to give your blog a professional look, then here I will show you excellent trick which let you add author Bio box within no time. Pay Attention: Prism Syntax Highlighter Shortcode For BlogSpot Blogs Adding